June 1st, 2021 is when Google discarded unlimited photo storage, and of course, they started advertising “Google One” as cloud storage. And for those who really care about backup and cloud storage, I think it’s really cheap and reliable solution. However, being a dev and ops guy myself, I thought of developing a cheaper solution that would meet my photo backup requirement.
Taking an image, freezing a moment, reveals how rich reality truly is.
– Anonymous
Google offers 100 GB of storage for 130 INR. This storage can be used across various Google platform applications. However, you don’t end up using all the space in one go. I am a long-time Google Photos user and I really like features such as album, face search, memories reminders, and sometimes photo enhancing on the fly.
For me, I keep snapping photos randomly. Sometimes I visit places and then I take random snaps with my DSLR and mobile Phone. So in general I upload somewhat ~200 or fewer photos monthly. The size of the photos varies in the range of 4MB to 30MB. On average I may be using 4GB of monthly storage for backup on my external hard drive to keep raw photos. Even bad ones I do not delete. Photos backed up on the cloud should be visually good and also it’s good to have a raw copy available at the same time, so that you may do some lightroom changes (although I never touch them 😛 ). So here is my minimal requirement:
- Should support social authentication (google sign in preferred).
- Photos should be stored in raw format securely.
- Storage should be scaled with usage.
- I should be able to upload and download photos.
- Web view for preview would be nice.
- Should have almost no operations headache and solution should be as cheap as possible 😉
Selecting Tech Stack
To avoid operation headaches with servers going down, scaling, or maybe application crashing and overall monitoring, I opted for a serverless solution with AWS. The AWS S3 is infinite scalable storage and you only pay for the amount of storage you used. On top of that, you can opt for the S3 storage class which is efficient and cost-effective.
- Infrastructure Stack
- AWS API Gateway (http api)
- AWS Lambda (for processing images and API Gatway queries)
- Dynamodb (for storing image metadata)
- AWS Cognito (For Authentication)
- AWS S3 Bucket (for storage and web application hosting)
- AWS Certificate Manager (to use SSL certificate for custom domain with API gateway)
- Software Stack
- NodeJS
- ReactJS and Material-UI (front-end framework and UI)
- AWS Amplify (For simplifying auth flow with cognito)
- Sharp (High speed nodejs library for converting images)
- express and serversless-http
- Infinite Scroller (For Gallery View)
- Serverless Framework (for ease of deployment and Infrastructure as Code)

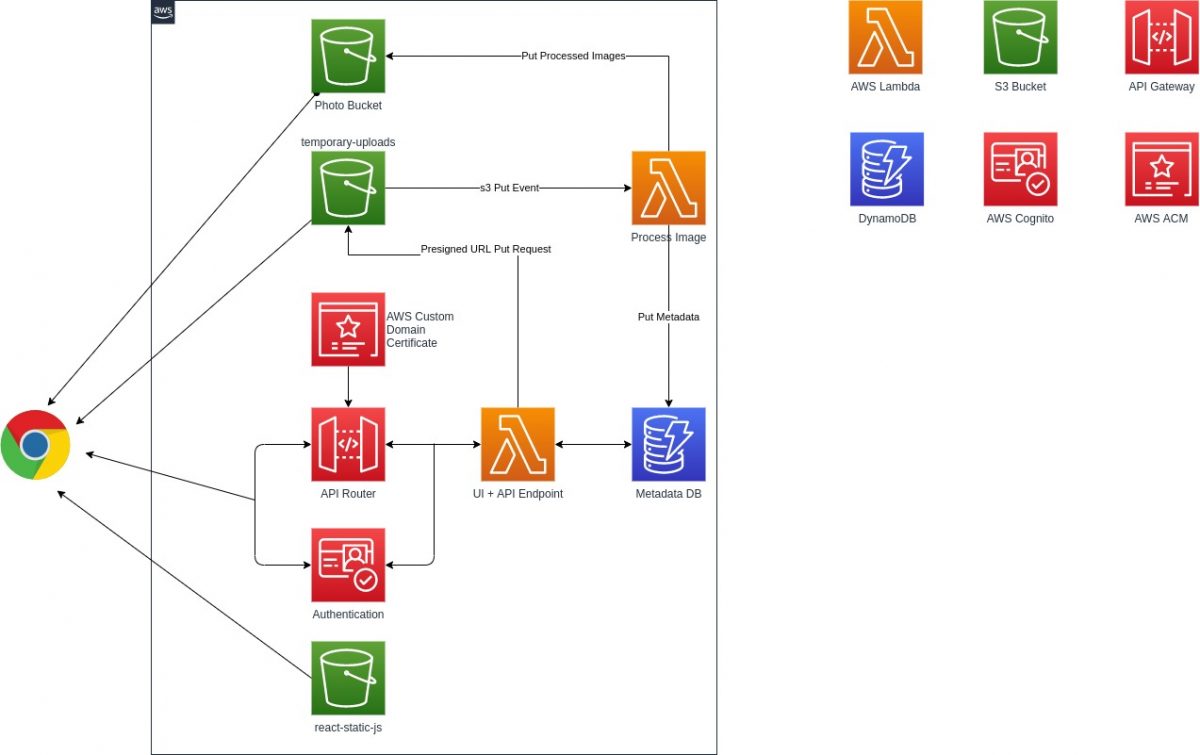
Create S3 Buckets:
We will create three S3 buckets. Create one for hosting a frontend application (refer to architecture diagram, more on this discussed later at build and hosting part). The second one is for temporary uploading images. The third one is for actual backup and storage (enable server-side encryption on this bucket). A temporary upload bucket will process uploaded images. During the pre-processing, we will resize the original image into two different sizes. One is for thumbnail purposes (400px width), another one is for viewing purposes, but with reduced quality (webp format). Once images are resized, upload all three (raw, thumbnail, and webview) to the third s3 bucket and create a record in dynamodb. Setup object expiry policy on the temporary bucket for 1 day. This way uploaded objects are automatically deleted from the temporary bucket.
Setup trigger on temporary bucket for uploaded images:
We will need to set up S3 PUT event which will trigger our Lambda function to download and process image. We will filter suffix jpg, jpeg for an event trigger, meaning that any file with extension .jpg and .jpeg uploaded to our temporary bucket will automatically invoke a lambda function with event payload. The lambda function with the help of the event payload will download the uploaded file and perform processing. Your serverless function definition would look like below:
functions:
  lambda:
    handler: index.handler
    memorySize: 512
    timeout: 60
    layers:
      - {Ref: PhotoParserLibsLambdaLayer}
    events:
      - s3:
          bucket: your-temporary-bucket-name
          event: s3:ObjectCreated:*
          rules:
            - suffix: .jpg
          existing: true
      - s3:
          bucket: your-temporary-bucket-name
          event: s3:ObjectCreated:*
          rules:
            - suffix: .jpeg
          existing: true
Notice that in the YAML events section we set “existing:true”. This assures that the bucket will not be created during the serverless deployment. However, if you plan not to manually create your s3 bucket you can let the framework create a bucket for you.
Below is the sample code for downloading object and processing with Sharp library.
let s3object = s3.getObject({
	Bucket: event.Records[0].s3.bucket.name,
	Key: keyevent.Records[0].s3.object.key
}).promise()

let image = sharp(s3object.Body);

let outputBuffer = await image.resize(width).webp().toBuffer();

//upload outputBuffer via s3.PutObject Method
DynamoDB as metadatadb :
AWS dynamodb is a key-value document db which is suitable for our use case. Dynamodb will help us retrieve the list of photos available in time series. Dynamodb uses a primary key for uniquely identifying each record. A primary key can be composed of a hash key and range key (also called a sort key). A range key is optional. We will use federated identity id (discussed in setup authorization) as hash key (partition key) and name it as the username for attribute definition name with type string. We will use the timestamp attribute definition name as a range key with a type number. Range key will help us query results with time-series (Unix epoch). We can also use dynamodb secondary indexes to sort results more distinctly. However, to keep the application simple at this moment I am going to opt-out of this feature. Your serverless resource definition would look like below:
 resources:
  Resources:
    MetaDataDB:
      Type: AWS::DynamoDB::Table
      Properties:
        TableName: your-dynamodb-table-name
        AttributeDefinitions:
          - AttributeName: username
            AttributeType: S
          - AttributeName: timestamp
            AttributeType: N
        KeySchema:
          - AttributeName: username
            KeyType: HASH
          - AttributeName: timestamp
            KeyType: RANGE
        BillingMode: PAY_PER_REQUEST
Finally, you also need to set up the IAM role so that the process image lambda function would have access to the S3 bucket and dynamodb. Here is the serverless definition for the IAM role.
# you can add statements to the Lambda function's IAM Role here
  iam:
    role:
      statements:
      - Effect: "Allow"
        Action:
          - "s3:ListBucket"
        Resource:
          - arn:aws:s3:::your-temporary-bucket-name
          - arn:aws:s3:::your-actual-photo-bucket-name
      - Effect: "Allow"
        Action:
          - "s3:GetObject"
          - "s3:DeleteObject"
        Resource: arn:aws:s3:::your-temporary-bucket-name/*
      - Effect: "Allow"
        Action:
          - "s3:PutObject"
        Resource: arn:aws:s3:::your-actual-photo-bucket-name/*
      - Effect: "Allow"
        Action:
          - "dynamodb:PutItem"
        Resource:
          - Fn::GetAtt: [ MetaDataDB, Arn ]
Setup Authentication :
Okay to set up Cognito user pool, head to Cognito console and create user pool with below config:
- Pool Name : photobucket-users
- How do you want your end users to sign in? :
- Select : Email Address or Phone Number
- Select : Allow Email Addresses
- Check : (Recommended) Enable case insensitivity for username input
- Which standard attributes are required?
- Keep the defaults for “Policies”
- MFA and Verification:
- I opted to manually reset password for user (since this is internal app)
- Disabled user verification
- Keep the default of Message Customizations, tags and devices.
- App Clients :
- App client name : myappclient
- Let the refresh token, access token and id token be default
- Check all “Auth flow configurations”
- Check enable token revocation
- Skip Triggers
- Review and Create the pool
Once created goto App integration -> domain name. Create a Cognito subdomain of your choice and note this. Next, I plan to use the Google Sign-In feature with Cognito Federation Identity Providers. Use this guide to set up google social identity with Cognito.
Setup Authorization:
Once the user identity is verified, we need to authorize the user so as to access the s3 bucket with limited permissions. Head to the Cognito console, select federated identities, and create a new identity pool. Follow below steps to configure:
- Identity pool name : photobucket_auth
- Keep Unauthenticated and Authentication flow settings to unchecked.
- Authentication providers:
- User Pool Id : Enter the user pool id obtained during authentication setup
- App Client Id : Enter the app client id generated during authentication setup. (Cognito user pool -> App Clients -> App client id)
- Setup permissions:
- Expand view details (Role Summary)
- For authenticated identities : edit policy document and use below JSON policy and skip unauthenticated identities with default configuration.
{
    "Version": "2012-10-17",
    "Statement": [
        {
            "Effect": "Allow",
            "Action": [
                "mobileanalytics:PutEvents",
                "cognito-sync:*",
                "cognito-identity:*"
            ],
            "Resource": [
                "*"
            ]
        },
        {
            "Sid": "ListYourObjects",
            "Effect": "Allow",
            "Action": "s3:ListBucket",
            "Resource": [
                "arn:aws:s3:::your-actual-photo-bucket-name"
            ],
            "Condition": {
                "StringLike": {
                    "s3:prefix": [
                        "${cognito-identity.amazonaws.com:sub}/",
                        "${cognito-identity.amazonaws.com:sub}/*"
                    ]
                }
            }
        },
        {
            "Sid": "ReadYourObjects",
            "Effect": "Allow",
            "Action": [
                "s3:GetObject"
            ],
            "Resource": [
                "arn:aws:s3:::your-actual-photo-bucket-name/${cognito-identity.amazonaws.com:sub}",
                "arn:aws:s3:::your-actual-photo-bucket-name/${cognito-identity.amazonaws.com:sub}/*"
            ]
        }
    ]
}
${cognito-identity.amazonaws.com:sub} is a special AWS variable. When a user is authenticated with a federated identity, each user is assigned a unique identity. What the above policy means is any user who is authenticated should have access to objects prefixed by his own identity id. This is how we intend users to authorize in a limited area within the s3 bucket.
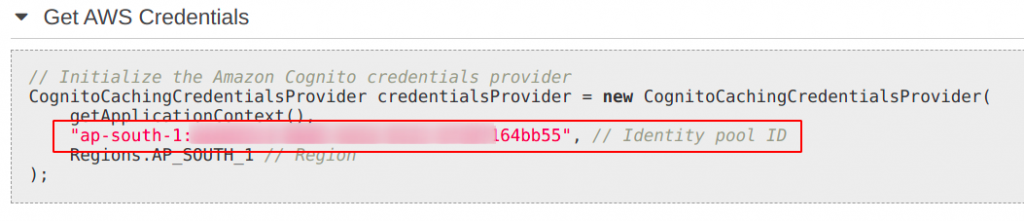
Copy the Identity Pool Id (from sample code section). You will need this in your backend to get the identity id of the authenticated user via JWT token.
Amplify configuration for frontend UI sign in:
The below object helps you set up the minimal configuration for your application. This is all that we need to sign in via Cognito and access the S3 photo bucket.
const awsconfig = {
    Auth : {
        identityPoolId: "idenity pool id created during authorization setup",
        region : "your aws region",
        identityPoolRegion: "same as above if cognito is in same region",
        userPoolId : "cognito user pool id created during authentication setup",
        userPoolWebClientId : "cognito app client id",
        cookieStorage : {
            domain : "https://your-app-domain-name", //this is very important
            secure: true
        },

        oauth: {
            domain : "{cognito domain name}.auth.{cognito region name}.amazoncognito.com",
            scope : ["profile","email","openid"],
            redirectSignIn: 'https://your-app-domain-name',
            redirectSignOut: 'https://your-app-domain-name',
            responseType : "token"
        }
    },
    Storage: {
        AWSS3 : {
            bucket: "your-actual-bucket-name",
            region: "region-of-your-bucket"
        }
    }
};

export default awsconfig;
You can then use the below code to configure and sign in via social authentication.
import Amplify, {Auth} from 'aws-amplify';
import awsconfig from './aws-config';

Amplify.configure(awsconfig);

//once the amplify is configured you can use below call with onClick event of buttons or any other visual component to sign in.


//Example
<Button startIcon={<img alt="Sigin in With Google" src={logo} />} fullWidth variant="outlined" color="primary" onClick={() => Auth.federatedSignIn({provider: 'Google'})}>
    Sign in with Google
</Button>
Gallery View:
When the application is loaded we use the PhotoGallery component to load photos and view thumbnails on-page. The Photogallery component is a wrapper around the InfinityScoller component which keeps loading images as the user scroll. The idea here is we query a max of 10 images in one go. Our backend returns a list of 10 images (just the map and metadata to S3 bucket). It is our responsibility to load these images from the S3 bucket and then show thumbnails on-screen as gallery view. When the user reaches the bottom of the screen or there is visual empty space left, the InfiniteScroller component load 10 more images. This goes on till our backend replies with a stop marker.
The key point here is that we need to send JWTToken as a header to our backend service via ajax call. JWT Token is obtained post a sign-in from Amplify framework. Example to obtain JWT token as below:
let authsession = await Auth.currentSession();
let jwtToken = authsession.getIdToken().jwtToken;

let photoList = await axios.get(url,{
	headers : {
		Authorization: jwtToken
	},
	responseType : "json"
});
An example of Infinite Scroller component usage is given below. Note that “gallery” is JSX composed array of photo thumbnails. “loadMore” method calls our ajax function to server-side backend and updates “gallery” variable and sets “hasMore” variable true/false so that infinite scroller component should stop queering when there are no photos left to display on the screen.
<InfiniteScroll
	loadMore={this.fetchPhotos}
	hasMore={this.state.hasMore}
	loader={<div style={{padding:"70px"}} key={0}><LinearProgress color="secondary" /></div>}
>
	<div style={{ marginTop: "80px", position: "relative", textAlign: "center" }}>
		<div className="image-grid" style={{ marginTop: "30px" }}>
			{gallery}
		</div>
		{this.state.openLightBox ?
		<LightBox src={this.state.lightBoxImg} callback={this.closeLightBox} />
		: null}

	</div>
</InfiniteScroll>
Lightbox component gives zoom effect to thumbnail. When the thumbnail is clicked, a higher resolution picture (webp version) is downloaded from the S3 bucket and shown on the screen. We use a Storage object from Amplify library. Downloaded content is blob thus needs to be converted into image data. To do so we use the javascript native method createObjectURL. Below is the sample code that downloads the object from the s3 bucket and then converts it into a viewable image for the HTML IMG tag.
thumbClick = (index) => {
	const urlCreater = window.URL || window.webkitURL;

	try {
		this.setState({
			openLightBox: true
		});

		Storage.get(this.state.photoList[index].src,{download: true}).then(data=>{
			let image = urlCreater.createObjectURL(data.Body);
			this.setState({
				lightBoxImg : image
			});
		});

	} catch (error) {
		console.log(error);
		this.setState({
			openLightBox: false,
			lightBoxImg : null
		});
	}
};
Uploading Photos:
S3 SDK lets you generate presigned POST URL. Anyone who gets this URL will be able to upload objects to the s3 bucket directly without the need of having credentials. Of course, we can actually set up some boundaries, like we can set max object size, key of the uploaded object, etc. Refer to this AWS blog for more on presigned URLs. Here is the sample code to generate presigned URL.
let s3Params = {
	Bucket: "your-temporary-bucket-name,
	Conditions : [
		["content-length-range",1,31457280]
	],
	Fields : {
		key: "path/to/your/object"
	},
	Expires: 300 //in seconds
};

const s3 = new S3({region : process.env.AWSREGION });

s3.createPresignedPost(s3Params)
For better UX, we are likely to allow our users to upload more than one photo at a time. However presigned URL lets you upload a single object at a time. To overcome this, we generate multiple presigned URL’s. Initially, we send a request to our backend asking we need to upload photos with expected keys. This request is originated once the user selects photos to upload. Our backend then generates presigned URL’s for us. Our frontend react app then provides the illusion that all photos are being uploaded as a whole.
When the upload is successful, the s3 PUT event is triggered which we discussed earlier. The complete flow of the application is given in a sequence diagram. You can find the complete source code here in my GitHub repository.
React Build Steps and Hosting:
The ideal way to build the react app is to execute npm run build. However, we take a slightly different approach here. We are not using the s3 static website for serving frontend UI. For one reason, S3 static website is non-SSL unless we use CloudFront. Therefore, we will make API Gateway our application entry point. Thus the UI will also be served from the API gateway. However, we want to reduce calls made to the API gateway. For this reason, we will only deliver the index.html file hosted with the help API gateway / Lamda, and the rest of the static files (react supporting JS files) from s3 bucket. This means that your index.html should have all the reference paths pointed to the s3 bucket. Thus build needs to exclusively specify that static files are located at a different location than relative to the index.html file. Your s3 bucket needs to be public with the right bucket policy and CORS set so that the end-user can only retrieve files and not upload some nasty objects. Those who are confused with how the S3 static website and S3 public bucket differs may refer to here. Below are the react build steps, bucket policy, and CORS.
PUBLIC_URL=https://{your-static-bucket-name}.s3.{aws_region}.amazonaws.com/ npm run build
//Bucket Policy
{
    "Version": "2012-10-17",
    "Id": "http referer from your domain only",
    "Statement": [
        {
            "Sid": "Allow get requests originating from",
            "Effect": "Allow",
            "Principal": "*",
            "Action": "s3:GetObject",
            "Resource": "arn:aws:s3:::{your-static-bucket-name}/static/*",
            "Condition": {
                "StringLike": {
                    "aws:Referer": [
                        "https://your-app-domain-name"
                    ]
                }
            }
        }
    ]
}


//CORS
[
    {
        "AllowedHeaders": [
            "*"
        ],
        "AllowedMethods": [
            "GET"
        ],
        "AllowedOrigins": [
            "https://your-app-domain-name"
        ],
        "ExposeHeaders": []
    }
]
Once a build is complete, upload index.html to a lambda that serves your UI. Run the below shell commands to compress static contents and host it on our static S3 bucket.
#assuming you are in your react app directory

mkdir /tmp/s3uploads
cp -ar build/static /tmp/s3uploads/
cd /tmp/s3uploads

#add gzip encoding to all the files
gzip -9 `find ./ -type f`

#remove .gz extension from compressed files
for i in `find ./ -type f`
do
	mv $i ${i%.*}
done

#sync your files to s3 static bucket and mention that these files are compressed with gzip encoding
#so that browser will not treat them as regular files
aws s3 --region $AWSREGION sync . s3://${S3_STATIC_BUCKET}/static/ --content-encoding gzip --delete --sse

cd -
rm -rf /tmp/s3uploads
Our backend uses nodejs express framework. Since this is a serverless application we need to wrap express with a serverless-http framework so as to work with lambda. Sample source code is given below, along with serverless framework resource definition. Notice that, except for the UI home endpoint ( “/” ), the rest of the API endpoints are authenticated with Cognito on API gateway itself.
const serverless = require("serverless-http");
const express = require("express");

const app = express();
.
.
.
.
.
.
app.get("/",(req,res)=> {
  res.sendFile(path.join(__dirname + "/index.html"));
});

module.exports.uihome = serverless(app);
provider:
  name: aws
  runtime: nodejs12.x
  lambdaHashingVersion: 20201221
  httpApi:
    authorizers:
      cognitoJWTAuth:
        identitySource: $request.header.Authorization
        issuerUrl: https://cognito-idp.{AWS_REGION}.amazonaws.com/{COGNITO_USER_POOL_ID}
        audience:
          - COGNITO_APP_CLIENT_ID
.
.
.
.
.
.
.
functions:
  react-serve-ui:
    handler: handler.uihome
    memorySize: 256
    timeout: 29
    layers:
      - {Ref: CommonLibsLambdaLayer}
    events:
      - httpApi:
          path: /prep/photoupload
          method: post
          authorizer:
            name: cognitoJWTAuth
      - httpApi:
          path: /list/photos
          method: get
          authorizer:
            name: cognitoJWTAuth
      - httpApi:
          path: /
          method: get
Final Steps :
At last, we will setup up a custom domain so that we don’t need to use the gibberish domain name generated by the API gateway and certificate for our custom domain. You don’t need to use route53 for this part. If you have an existing domain, you can create a subdomain and point it to the API gateway. First things first: Head to AWS ACM console and generate a certificate for the domain name. Once the request is generated you need to validate your domain by creating a TXT record as per the ACM console. The ACM is a free service. Domain verification may take few minutes to several hours. Once you have the certificate ready, head back to the API gateway console. Navigate to “custom domain names” and click create.
- Enter your application domain name
- Check TLS 1.2 as TLS version
- Select Endpoint type as Regional
- Select ACM certificate from dropdown list
- Create domain name
Select the newly created custom domain. Note the API Gateway domain name from Domain Details -> Configuration tab. You will need this to map as a CNAME/ALIAS record with your DNS provider. Click on the API Mappings tab. Click configure API mappings. From the dropdown select your API gateway, select stage as default, and click save. You are done here.
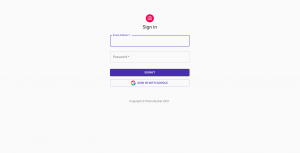
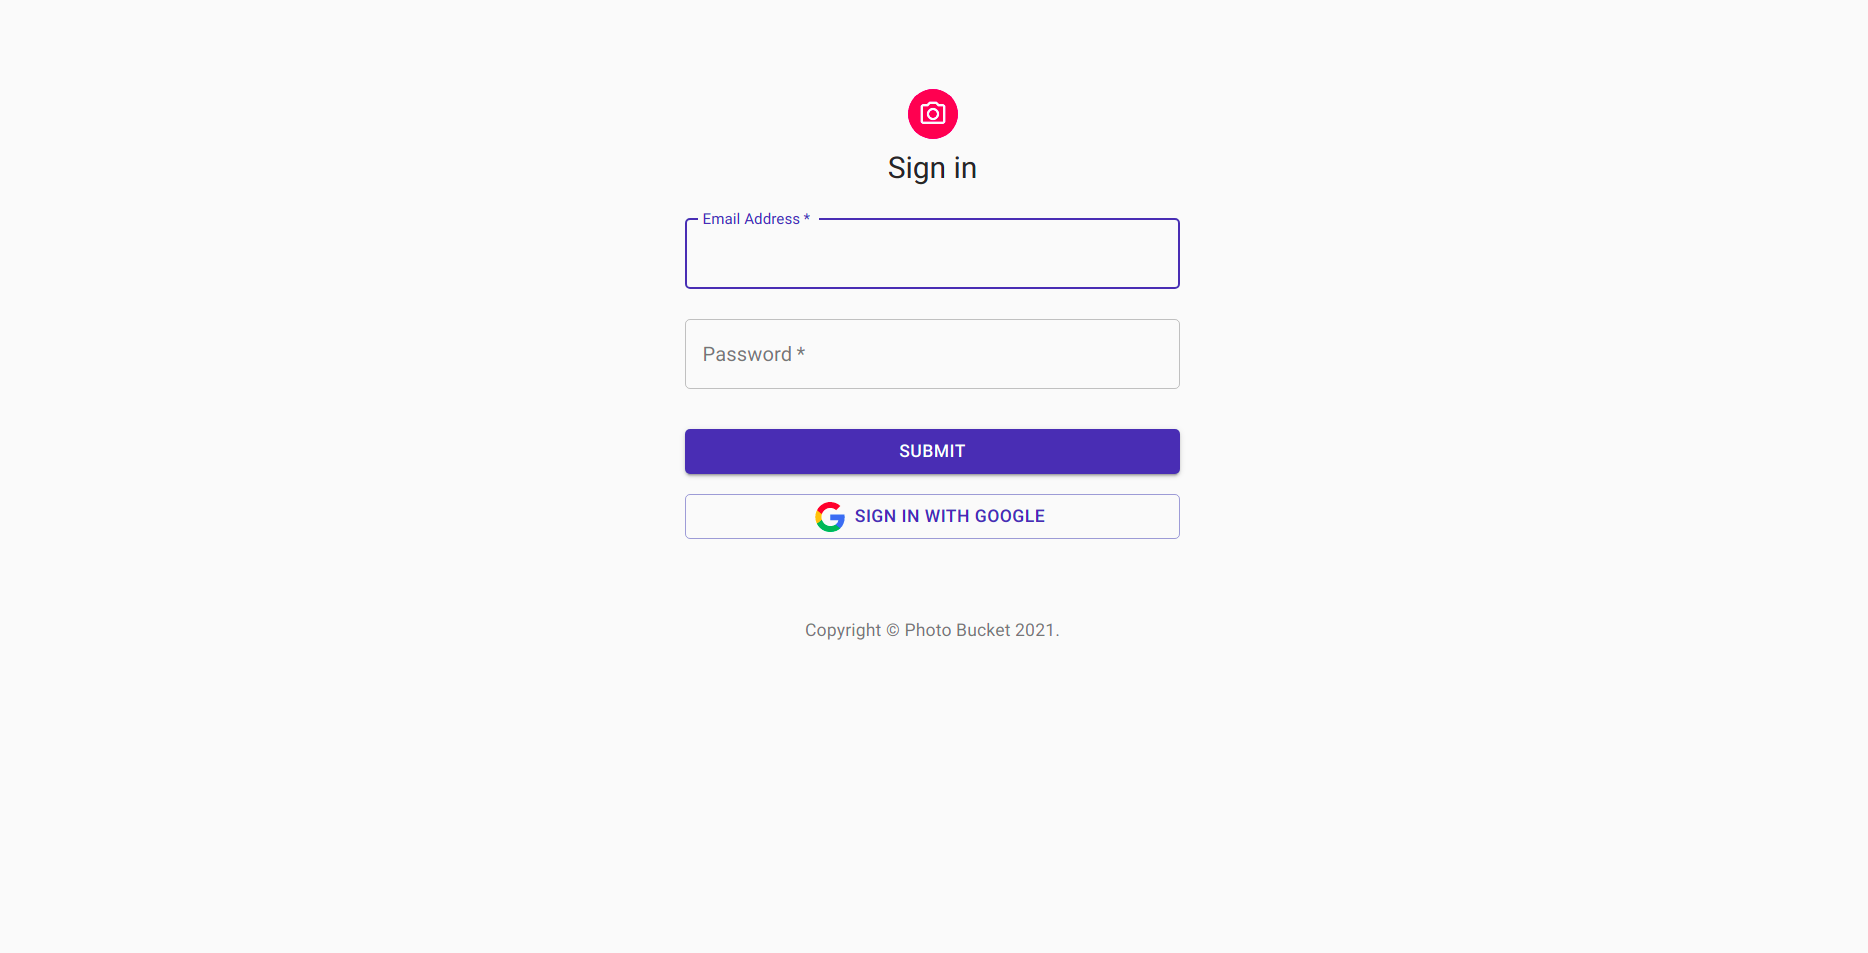
Login Page 
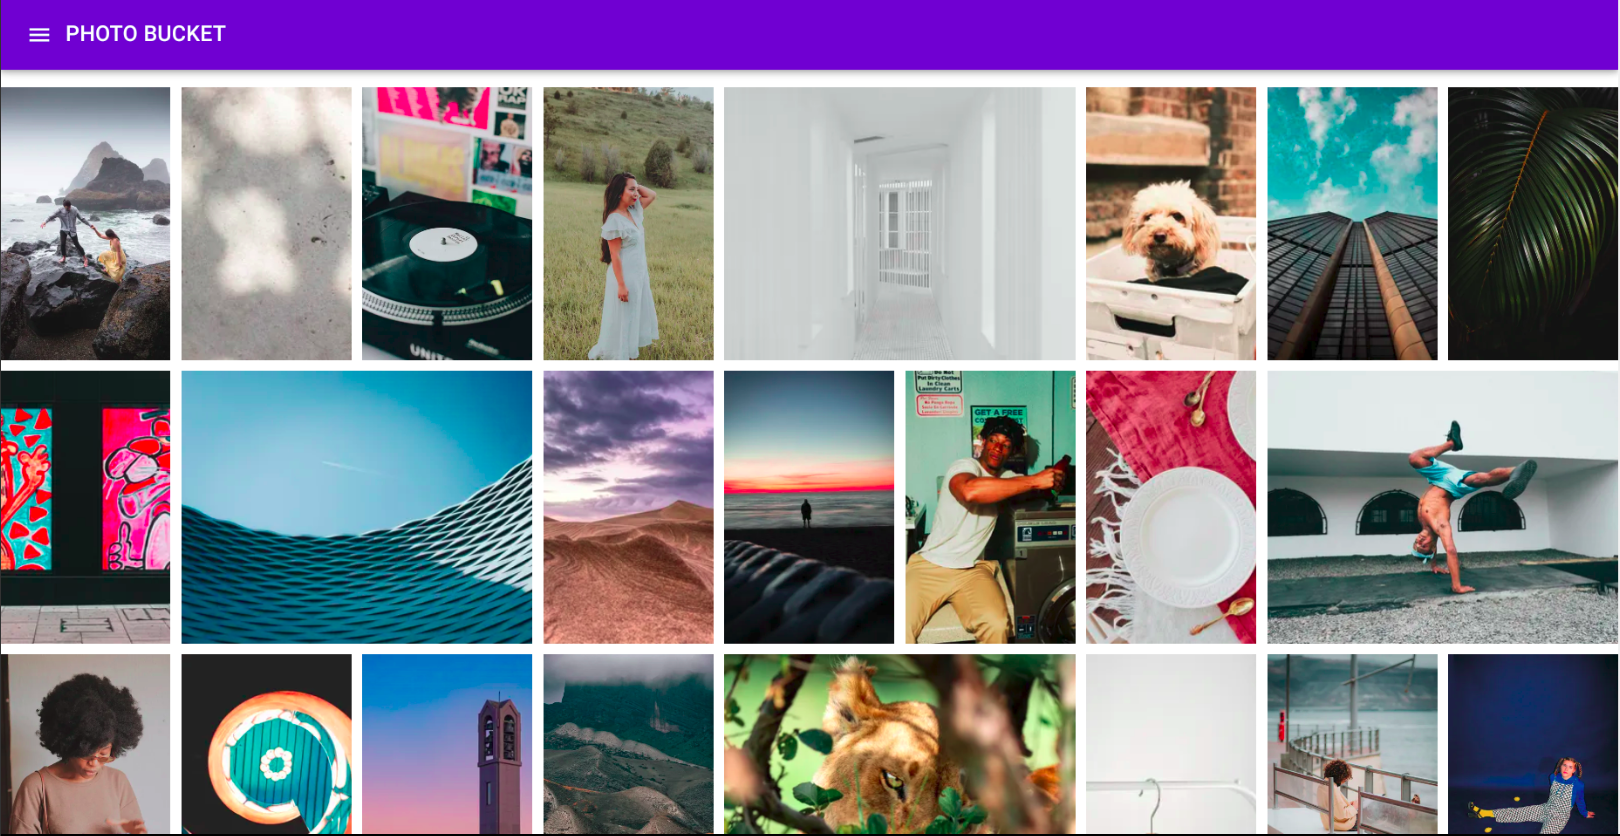
Home and Gallery View 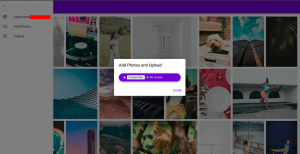
Pre Upload UI 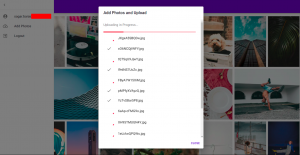
Upload UI


Future Scope and Improvements :
In order to improve application latency, we can use CloudFront as CDN. This way our entry point could be s3 and we no longer need to use API gateway regional endpoint. We can also add AWS WAF as an added security in front of our API gateway to inspect incoming requests and payloads. We can use Dynamodb secondary indexes so that we can efficiently search metadata in the table. Adding a lifecycle rule on raw photos which are not been accessed for more than a year can be transited to the S3 Glacier storage class. You can further add glacier deep storage transition so as to save more on storage costs.
Do you need help setting this up? Feel free to reach out to me 😉
5 replies on “My alternative to Google Photos – Serverless Solution With AWS”
Is it Possible for you to share the github link for this project
https://github.com/azadsagar/photobucket
[…] does not cover how to set up Cognito and integration with Google Authentication. You can refer to our old post for a detailed guide on setting up authentication and authorization. (Refer to the sections […]
Even though you have shared lots of details, unable to follow the steps to build the serverless solution. Would you mind sharing step by step to create the solution?
Hi Pearl, let me know what part you didn’t get ?