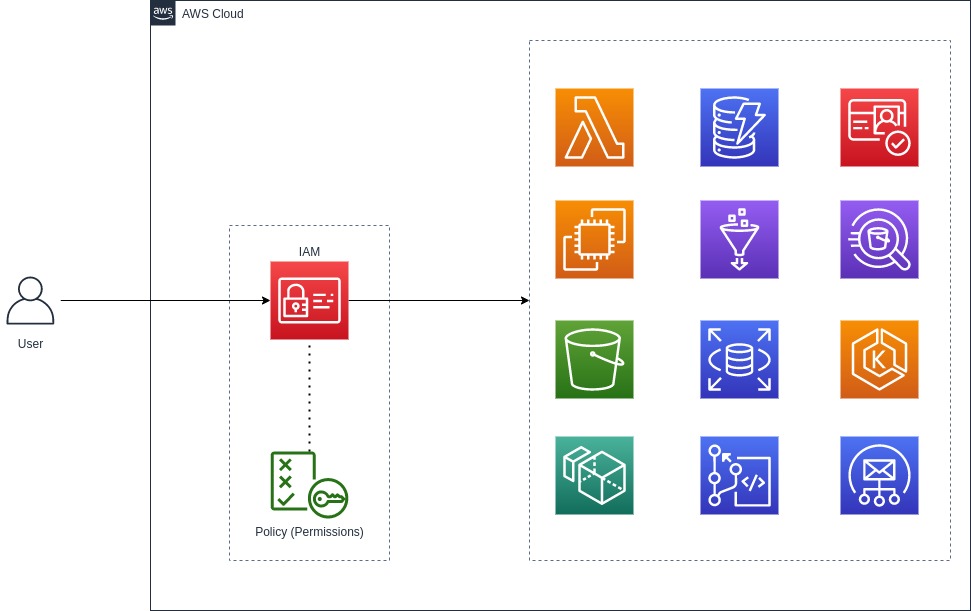
Identity and Access Management (IAM) offers role-based accessed control (RBAC) to your AWS account users and resources, you can granularize the permission set by defining policy. If you are familiar or even a beginner with AWS cloud, you know that how important IAM is.
AWS Identity and Access Management (IAM) is a web service that helps you securely control access to AWS resources. You use IAM to control who is authenticated (signed in) and authorized (has permissions) to use resources.
– AWS IAM User Guide
One of the coolest things with a cloud provider is you can write Infrastructure as a Code. AWS offers SDK for various programming/scripting languages. And of course, like any other API call, you need to sign a request with some tokens. AWS IAM console lets you generate access_key and secret_access_key token. This token can then be configured with your SDK. Alternatively, you can configure token with your user profile via aws cli. This also means anyone having access_key and secret_access_key will have permissions configured as per the IAM policy. Thus keeping credentials on the disk is insecure. One can implement a key rotation policy to keep the environment compliant. To even overcome this, you can use AWS IAM role for services. Let’s say if you are working on an AWS EC2 instance, that itself needs access to some other AWS service like S3, you can create an IAM role for EC2 with a policy having appropriate permission to access S3 bucket. In this case, your SDK doesn’t need token (not at least on the disk or hardcoded in code). Let us understand the hierarchy of how AWS SDK looks for token for signing requests.
- Embedded in your code (very insecure). This is the very first place you SDK looks for. Below is NodeJS example.
const {S3} = require("aws-sdk");

const s3 = new S3({
	accessKeyId : "ABCDEFGHIJKLMNOPQRST",
	secretAccessKey : "7is/HVjA8lm9hRrJyZEPWAs5Bo8KyyvEqjjxIHoO"
	//sessionToken : "options_session_token_if_applicable"
});
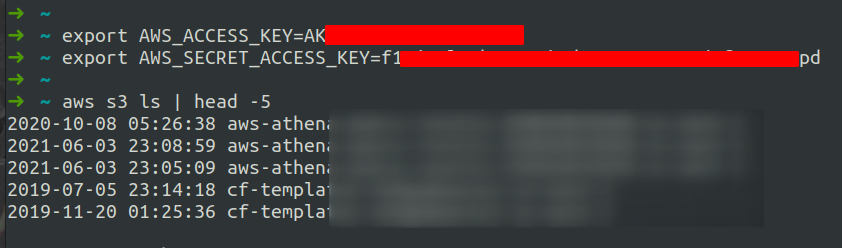
- AWS Environment variables. If the token is not embedded in your code, your SDK looks for AWS environment variable available to process. These environment variables are AWS_ACCESS_KEY, AWS_SECRET_ACCESS_KEY and optional AWS_SESSION_TOKEN. Below is the example, where AWS credentials are exported and aws cli command is used to list s3 buckets. Be noted that once credentials are exported they are available to all the child process. Therefore these credentials are auto looked up by your AWS SDK.
- AWS credentials (default profile) file located at
~/.aws/credentials. This the third place for the lookup. You can generate this file by running commandaws configure. You may also manually create this file with various profile. If you happen to have multiple profile you can then export environment variable call AWS_PROFILE. Example credentials file is given below.
[default] ; default profile
aws_access_key_id = <DEFAULT_ACCESS_KEY_ID>
aws_secret_access_key = <DEFAULT_SECRET_ACCESS_KEY>

[personal-account] ; personal account profile
aws_access_key_id = <PERSONAL_ACCESS_KEY_ID>
aws_secret_access_key = <PERSONAL_SECRET_ACCESS_KEY>

[work-account] ; work account profile
aws_access_key_id = <WORK_ACCESS_KEY_ID>
aws_secret_access_key = <WORK_SECRET_ACCESS_KEY>
- IAM Role attached to your resource. Your resource could be EC2 Instance, Lambda function, AWS glue, ECS Container, RDS, etc. Now, this is a secure way of using credentials. Since your credentials are not stored anywhere on the disk, exported via an environment variable, or hardcoded in code. You need not worry about key rotation at all.
TL;DR: IAM roles are a secure way of using credentials. However, they are only appliable to resources within AWS. You can not use them outside of AWS. Meaning the IAM role can only be attached to resources like EC2, Lambda, ECS, etc.
The so-called problem statement :
Let’s say a group of developers needs access to a few S3 buckets and DynamoDB. The organization does not want developers to use access_key and secret_access_key on their local machine (Laptop) as access_key and secret_access can be used anywhere or can be stolen. Since IAM roles are more secure, they allocate EC2 with Windows OS and attach IAM role with appropriate permission to access S3 buckets and DynamoDB and configures IDE and other essentials dev tools. Developers then use RDP to connect to EC2 Instance. However, due to license restrictions, only 2 users can connect with RDP at a given time. So they add more similar instances. This heavily increases cost. Wouldn’t it be nice If somehow IAM roles can be attached to local machines?
How do IAM roles for resources work ?
Resources like EC2 or Lambda have the link-local address available. The link-local address 169.254.169.254 can be accessed over HTTP port 80 to retrieve instance metadata. For instance, to get instance-id of EC2 instance from the host itself, you can query with GET request to curl -L http://169.254.169.254/latest/meta-data/instance-id/. Similarly, you can retrieve IAM credentials if IAM role is attached to EC2 instance. Let us assume you have created IAM role for EC2 instance with the name “iam-role-for-ec2”. Your SDK will then automatically access credentials via GET request to curl -L http://169.254.169.254/latest/meta-data/iam/security-credentials/iam-role-for-ec2/
$ curl -L 169.254.169.254/latest/meta-data/iam/security-credentials/iam-role-for-ec2/
{
  "Code" : "Success",
  "LastUpdated" : "2021-08-03T09:18:49Z",
  "Type" : "AWS-HMAC",
  "AccessKeyId" : "ASIASP26DFHDIOFNJFFX",
  "SecretAccessKey" : "EK1A7x9dntSzF9LlG7BK08C6zpTS/F6MHYTBo/+U",
  "Token" : "IQoJb3JpZ2luX2VjEPr//////////wEaCXVzLXdlc3QtMiJIMEYCIQCOCqHrHjEkYZUFsRtGXwa8gfGjsBmaU+WrL2Z0ihvA3QIhAIsGhJFiPetOod7IUUC++unWZfoUEgjEU0ULYwZUvGwwKvoDCBIQAhoMMTcxNDU5MTYwNTE4IgxFUXJfE/0cdJs2Gigq1wM8Ww8yAS2i2qUqsQ1t+yd4ATkE5fvIMDtHxzPQ2raVQb+cCgC/eJVQpeNET1SP01HnrN5W1QFID+xOPk3vZt6NrCy48OUf6+cCGrd63Jv/7glAsyQGaGM/Jt5ddi6593dgN7VLFHsEBAwqkZ3j/VjAzYbthP3clmRl++6k+vpiUp2j4uwM4zW/6f8faR6awPbPVmJsyh94pXaQXJU+H0w+9Hp0MlUvP6GRqBiuTwv/+EOiRfth1XGRxxOuR5X+fr0Ve4tede2x0ZvSLeUsUENHlOQnUkSGbu1Hiv1BhDEjhzbHi7PXhW1G9N1FZObE+wdF4hGYbe3LUUIrnp2xnIcxKzmume2YQvFE4DvJvBtF22DsdLP4GPmitofhV2FGcVxP1f5Nv76M6SfOQY65vSZQde4LIwcotRIrMgwEWup2Rplq6s56K93IYXp6QmnUWLgdtcMBTMVQsOFhCdj05P+VYqlKe5xRT4/8BucmIHn7+J4indNoL+3BvYvnpiISdcEhlyswNZOPhVQJjwJfKPPdu9NDEKQ+Jep4wpVvOSh+CAtxKtqwGz1wrKzqlRvzqBFaEQrD4WdPdf9YnTvmKIXgPuk74pZRlarVsREL0KmG6G0zzA2lRYow6JOkiAY6pAHIZGH+UH5RL79drKe86tUnWCORcX9omN2uUK7FemTENwyvholib4jLGY6HcjvDF10jqkcu1KEV20xNsPj87BP7irEH7xH//Jz2+rnSaN5PCqLezSsATPYhHFQjg6Oti+0E33F+F5MA25Pn2+u5TDP1VfFgYExwSor79gNtwbOMs76432ssHYFioYjHttPfVwyNXloLCwgphqJBwiNhMDMcKapK6Q==",
  "Expiration" : "2021-08-03T15:47:26Z"
}
Notice that the response payload is JSON with AccessKeyId, SecretAccessKey, and Token. Additionally, there is an Expiration key, which states the validity of the token. This means token is autogenerated once they expire.
Solution:
Now that you know how IAM roles work and how important link-local address plays the role, you probably have guessed what needs to be done so that you can access IAM role credentials from your local machine. I came up with two solutions.
- Host a lightweight reverse proxy server like nginx and then write a wrapper around your SDK so that initial calls are made to EC2 and credentials are retrived.
- Route a traffic originiating from your system targeting to 169.254.169.254. Traffic should reach to EC2 instance and EC2 itself should take care of forwarding packets to instance metadata server.
The second solution may sound pretty techy, but it is the ideal solution and you don’t need to do additional tweaking in your SDK. The developer is transparent about what is being implemented.
Implementation:
- Launch Linux (Ubuntu 20.04 LTS prefered) EC2 instance from AWS console and attach IAM role with appropriate permissions. Instance should be in public subnet and make sure to attach Elastic IP address. Whitelist incoming port 1194 UDP (open to world) and port 22 (ssh, open to your IP address only) TCP in your instance security group.
- Install OpenVPN and git package.
apt update; apt install git openvpn. - Clone easy-rsa respository on your server.
cd ~;git clone https://github.com/OpenVPN/easy-rsa.git - Generate certificates for OpenVPN server and client using easy-rsa.
#switch to easy-rsa directory
cd ~/easy-rsa/easyrsa3

#copy vars.example to vars
cp vars.example vars

#Find below variables in "vars" file and edit them according to your need
set_var EASYRSA_REQ_COUNTRY    "US"
set_var EASYRSA_REQ_PROVINCE   "California"
set_var EASYRSA_REQ_CITY       "San Francisco"
set_var EASYRSA_REQ_ORG        "Copyleft Certificate Co"
set_var EASYRSA_REQ_EMAIL      "[email protected]"
set_var EASYRSA_REQ_OU         "My Organizational Unit"

#Also edit below two variable if you plan to run easyrsa in non-interactive mode
# EASYRSA_REQ_CN should be set to your ElasticIP Address.
# Note: If your are using openvpn behind load balancer, or if you plan to map DNS to your server then this should be set to your DNS name
set_var EASYRSA_REQ_CN         "Your Instance Elastic IP"
set_var EASYRSA_BATCH          "NONEMPTY"
#====================================================


#Generate certificate and keys for server and client
./easyrsa init-pki
./easyrsa build-ca nopass
./easyrsa gen-dh
./easyrsa build-server-full server nopass
./easyrsa build-client-full client nopass


#Copy certificates and keys to server configuration
cp -p ./pki/ca.crt /etc/openvpn/
cp -p ./pki/issued/server.crt /etc/openvpn/
cp -p ./pki/private/server.key /etc/openvpn/
cp -p ./pki/dh.pem /etc/openvpn/dh2049.pem

cd /etc/openvpn
openvpn --genkey --secret myvpn.tlsauth


echo "net.ipv4.ip_forward = 1" >>/etc/sysctl.conf

sysctl -p
- Configure OpenVPN server.conf file:
port 1194
proto udp
dev tun
ca ca.crt
cert server.crt
key server.key  # This file should be kept secret
dh dh2048.pem
topology subnet
server 10.8.0.0 255.255.255.0
ifconfig-pool-persist ipp.txt
push "redirect-gateway def1 bypass-dhcp"
push "dhcp-option DNS 8.8.8.8"
push "dhcp-option DNS 1.1.1.1"
push "route 169.254.169.254 255.255.255.255"
keepalive 10 120
tls-auth myvpn.tlsauth 0
cipher AES-256-CBC
comp-lzo
user nobody
group nogroup
persist-key
persist-tun
status openvpn-status.log
log-append  /var/log/openvpn.log
verb 4
explicit-exit-notify 1
remote-cert-eku "TLS Web Client Authentication"
In the above configuration file, make sure line number 9 is not conflicting with your AWS VPC CIDR. Line number 14 (push "route 169.254.169.254 255.255.255.255") is what does a trick for us and is the heart of this blog post. This assures that when a client connects via OpenVPN, a route is added to the client machine so that packets targetting to 168.254.169.254 are routed via OpenVPN tunnel. (Note: If you do not add this here, you can manually add a route to your client-side once OpenVPN is connected. ip route add 169.254.169.254/32 YOUR_TUNNEL_IP dev tun0)
- Generate an OpenVPN client configuration file:
#These commands are execute on your EC2 (openvpn)

cd ~/easy-rsa/easyrsa3

cat <<EOF >/tmp/client.ovpn
client
dev tun
proto udp
remote YOUR-ELASTIC-IP-ADDRESS 1194
resolv-retry infinite
nobind
persist-key
persist-tun
cipher AES-256-CBC
comp-lzo
verb 3
key-direction 1
EOF

#append ca certificate
echo '<ca>' >>/tmp/client.ovpn
cat ./pki/ca.crt >>/tmp/client.ovpn
echo '</ca>' >>/tmp/client.ovpn

#append client certificate
echo '<cert>' >>/tmp/client.ovpn
sed -n '/BEGIN CERTIFICATE/,/END CERTIFICATE/{p;/END CERTIFICATE/q}' ./pki/issued/client.crt >>/tmp/client.ovpn
echo '</cert>' >>/tmp/client.ovpn

#append client key
echo '<key>' >>/tmp/client.ovpn
cat ./pki/private/client.key >>/tmp/client.ovpn
echo '</key>' >>/tmp/client.ovpn

#append TLS auth key
echo '<tls-auth>' >>/tmp/client.ovpn
cat /etc/openvpn/myvpn.tlsauth >>/tmp/client.ovpn
echo '</tls-auth>' >>/tmp/client.ovpn
In the above configuration file make sure to update line number 9. This could be your EC2 elastic IP Address (or domain if mapped and configured).
- Finally, download the /tmp/client.ovpn file to your local machine. Install the OpenVPN client software and import the client.ovpn file and connect. If you are using Linux machine, you may connect to using
sudo openvpn --config /path/to/client.ovpn.
Testing:
Let us say you had configured IAM role with permission that lets you list S3 buckets. The idea here is, you should be able to access AWS resources once the OpenVPN client is connected. Your SDK should automatically look for credentials via metadata link-local address. You may install aws-cli utility and run aws s3 ls to list s3 buckets.
Conclusion:
IAM Role is meant to be used with AWS resources like EC2, ECS, Lambda, etc so that you wouldn’t keep the credentials hardcoded in the code or in the configuration file left unsecured on the disk. Our goal was to use IAM role directly from the local machine (Laptop). We achieved this by using OpenVPN secure SSL tunnel. The VPN assures that we are in a private network, thus keeping the environment compliant. This guide is not meant for how one should set up OpenVPN server/client. Therefore you must harden OpenVPN server. You may put the server behind the Network load balancer and may enforce MAC binding feature to your clients.
2 replies on “Hacking your way around AWS IAM Role for your Laptop”
Hey Sagar! Nicely explained and articulate blog. I enjoyed reading your blog. I found it interesting and out-of-the-box.
[…] one of my previous blog posts (Hacking your way around AWS IAM Roles), we demonstrated how users can access AWS resources without having to store AWS credentials on […]